Easy Sugar-Free Apple Pie with Warm Cinnamon

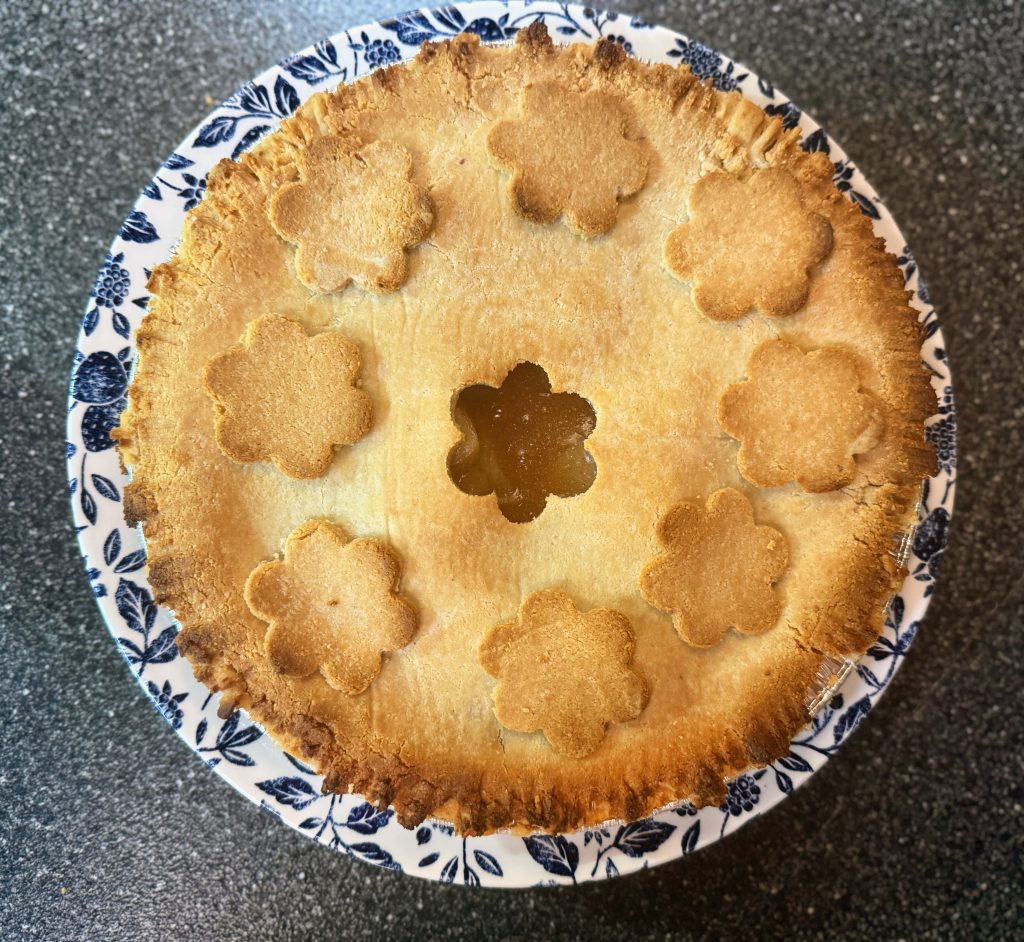
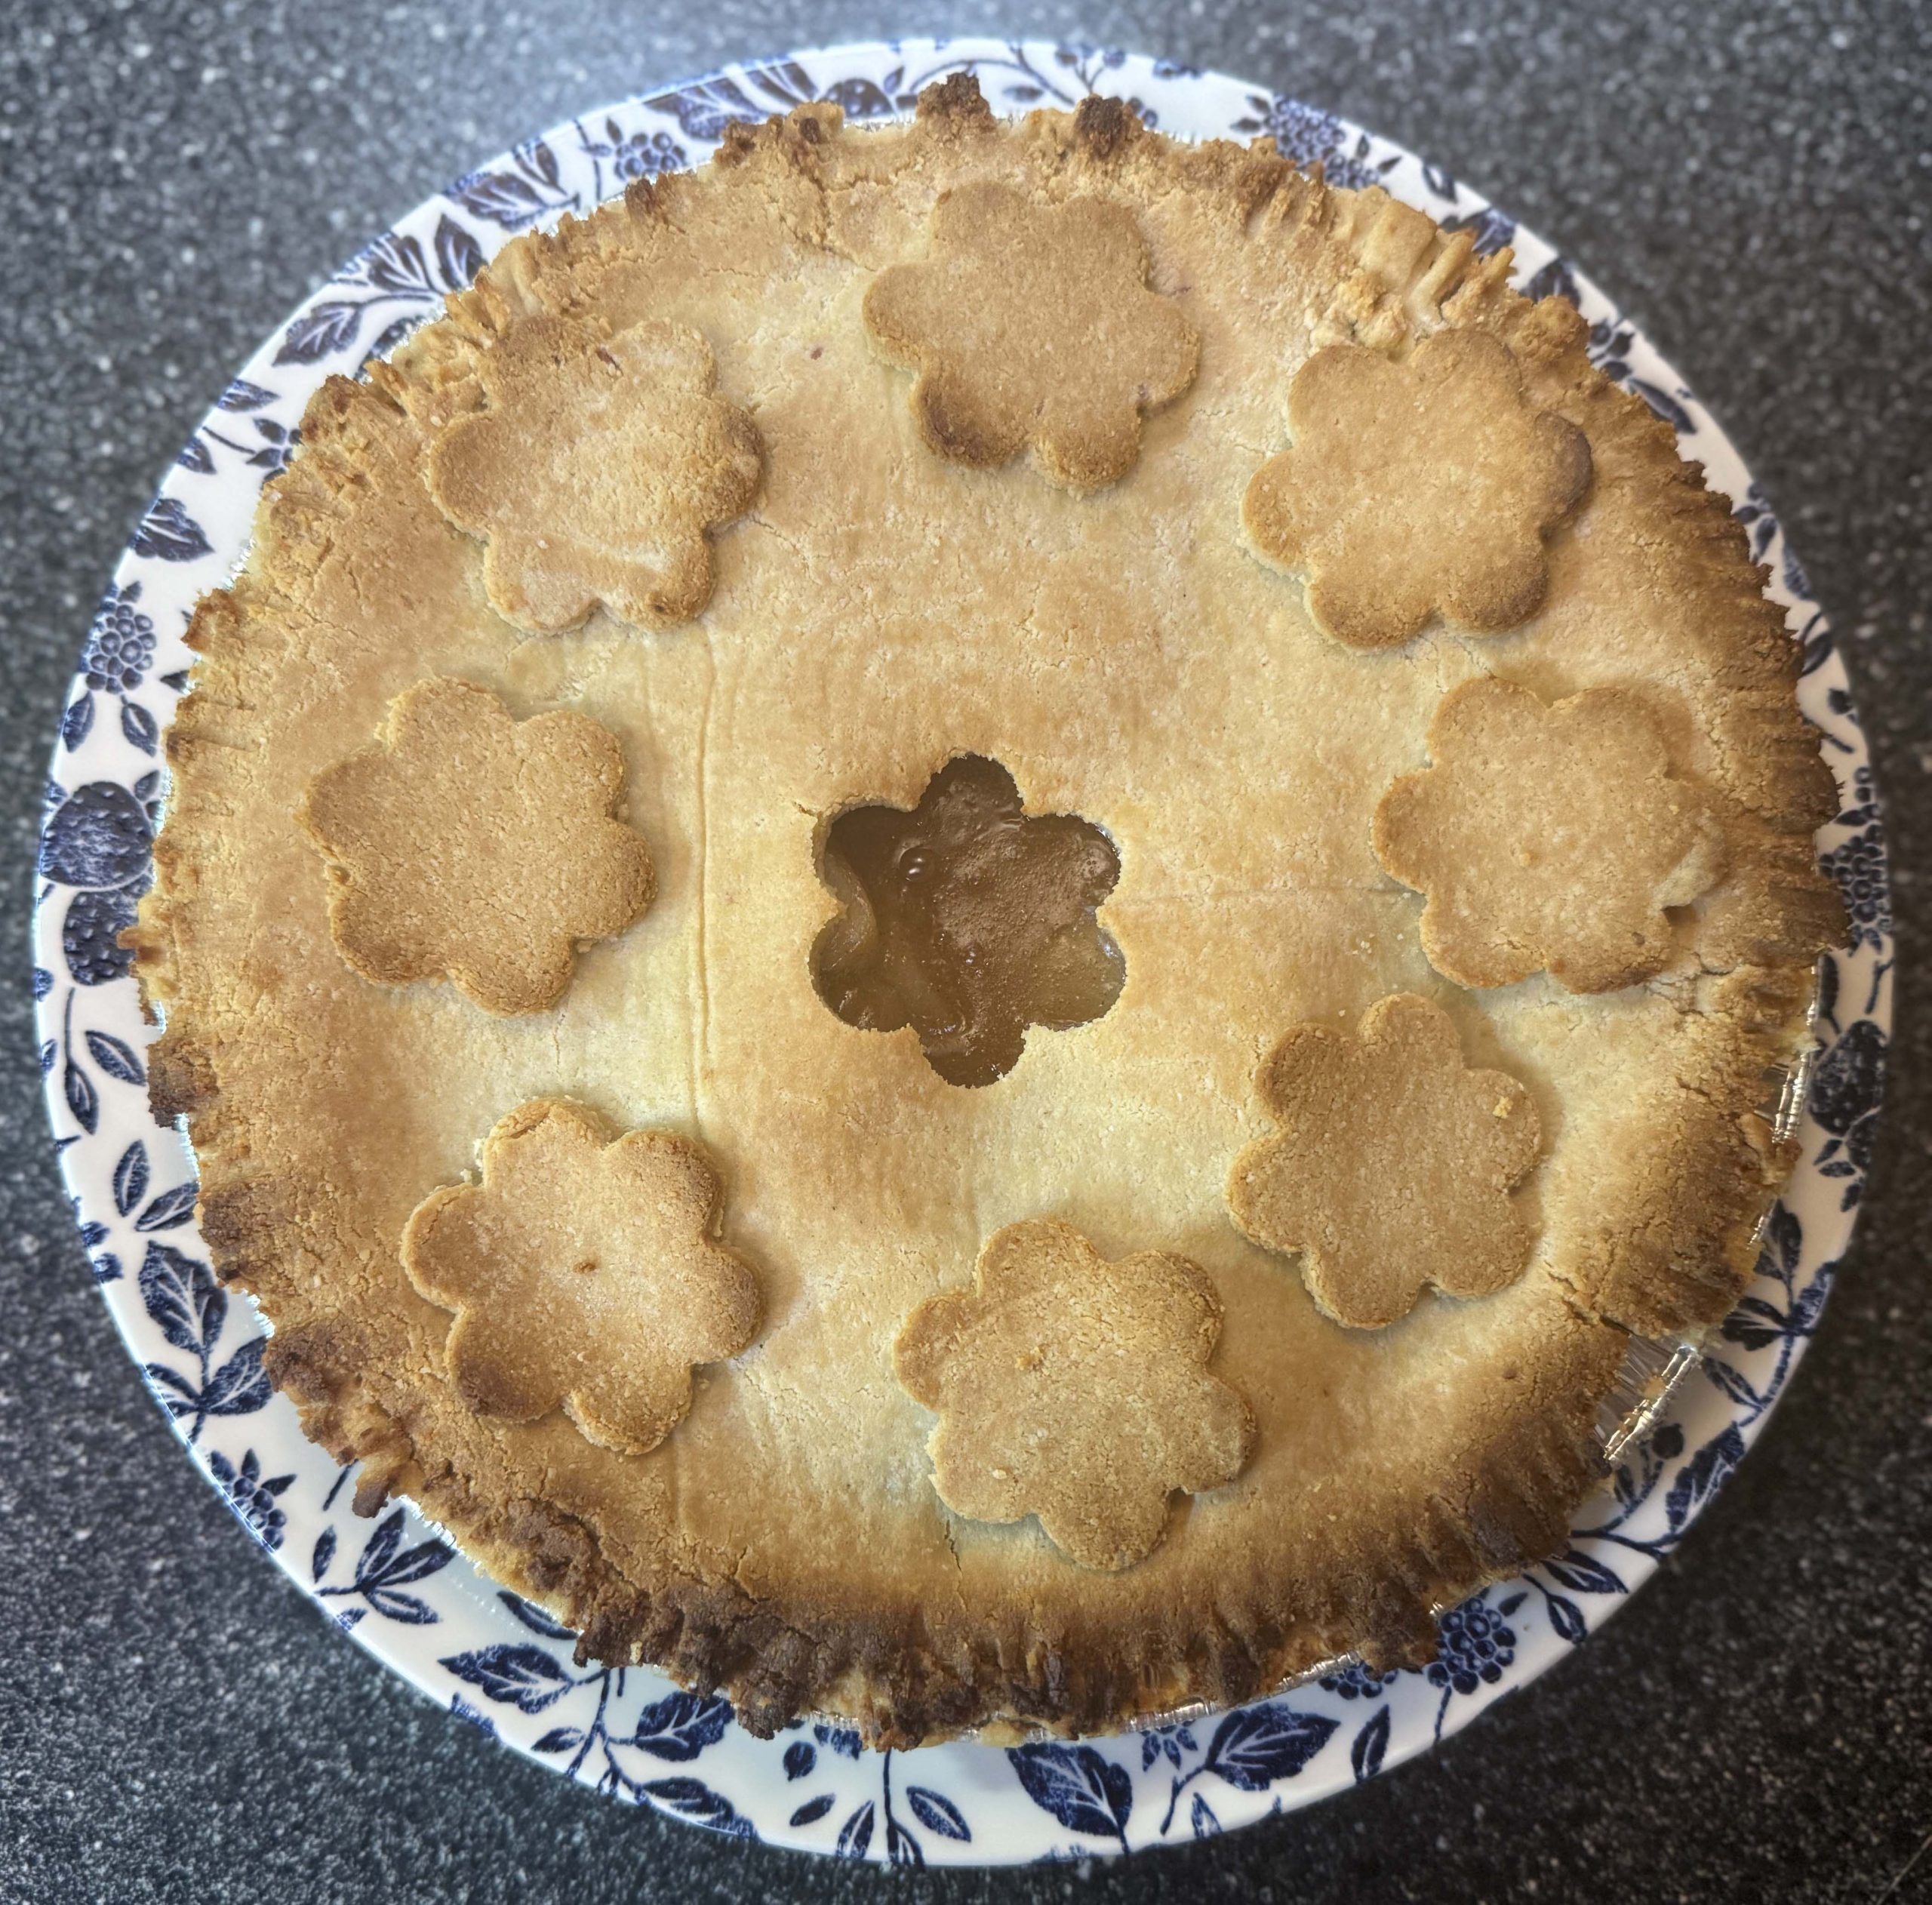
Freshly baked apple pie with warm cinnamon and a golden, flower-decorated crust. © 2026 The Comfy Cabin

Since it’s apple season, I’m celebrating with an easy apple pie here at the cabin. Tender apples, warm cinnamon, and a golden crust make this a cozy dessert for a crisp fall day.

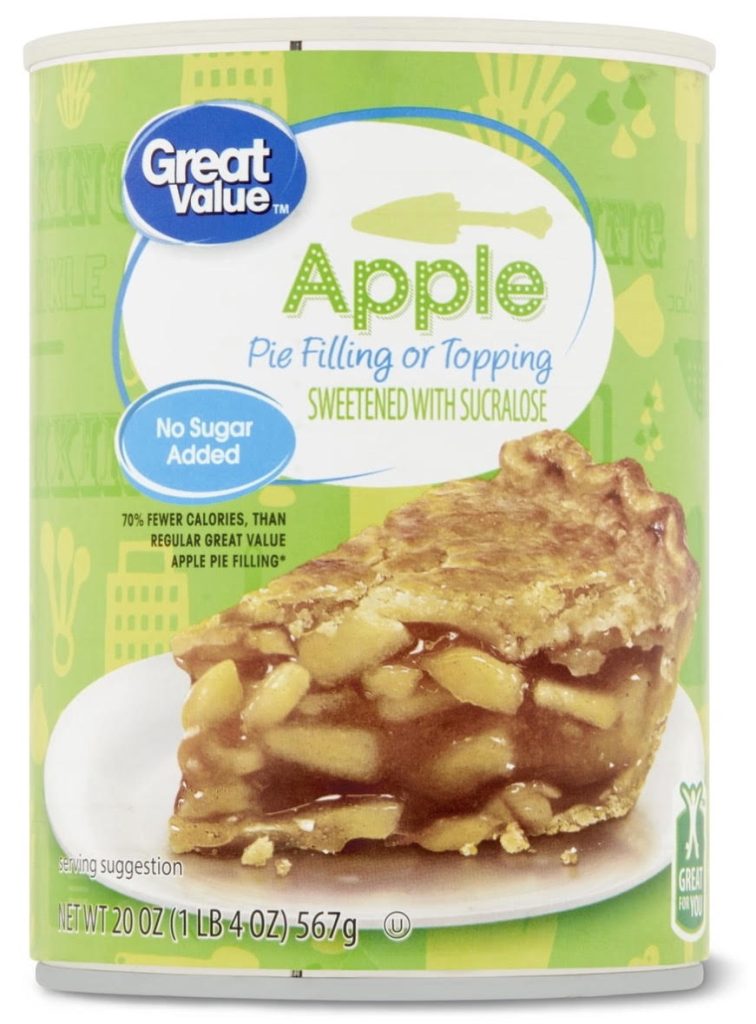
Using canned sugar-free apple pie filling keeps the preparation simple, with a little Splenda for extra sweetness. It’s an easy way to bring those familiar fall flavors to your table.
🍒 More pie to love:
If you’re craving a fruity dessert, be sure to try my Cherry Pie recipe too!
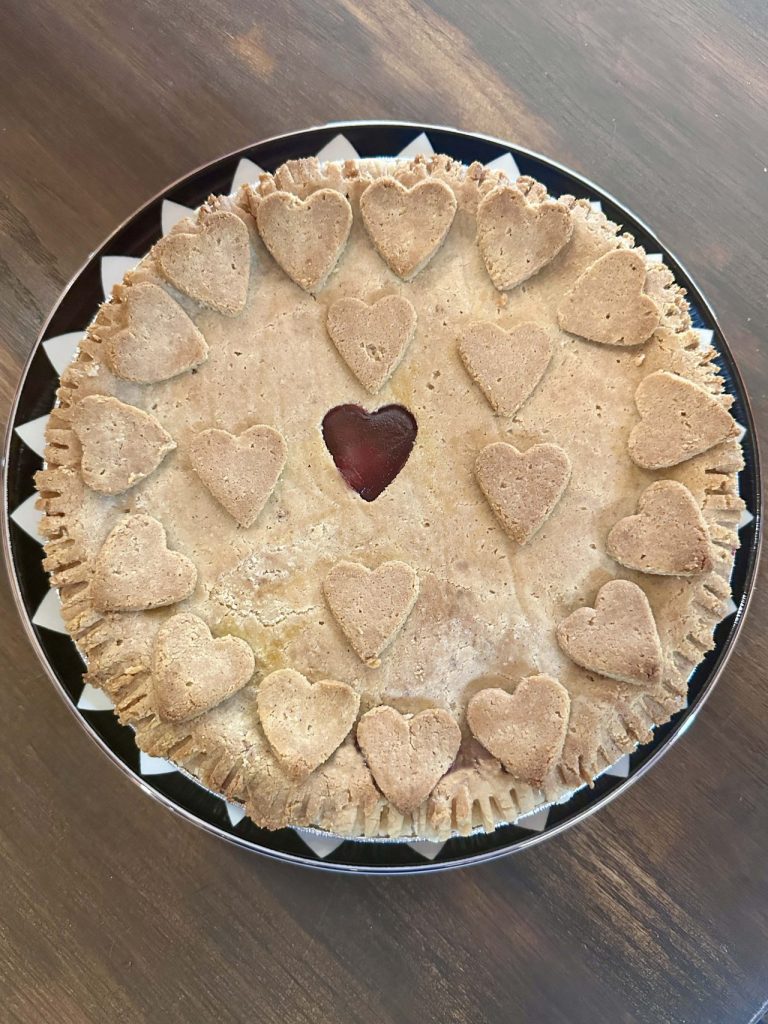
Homemade cherry pie with a heart-decorated crust. © 2026 The Comfy Cabin
The Comfy Cabin

Easy Sugar-Free Apple Pie with Warm Cinnamon

This easy sugar-free apple pie combines canned sugar-free apple filling, warm cinnamon, and a golden, flaky crust. A cozy dessert made with simple ingredients—perfect for autumn baking.
Prep Time 15 minutes
Cook Time 40 minutes
Total Time 55 minutes
Servings: 6 people
Course: Dessert
Cuisine: American

Ingredients
  

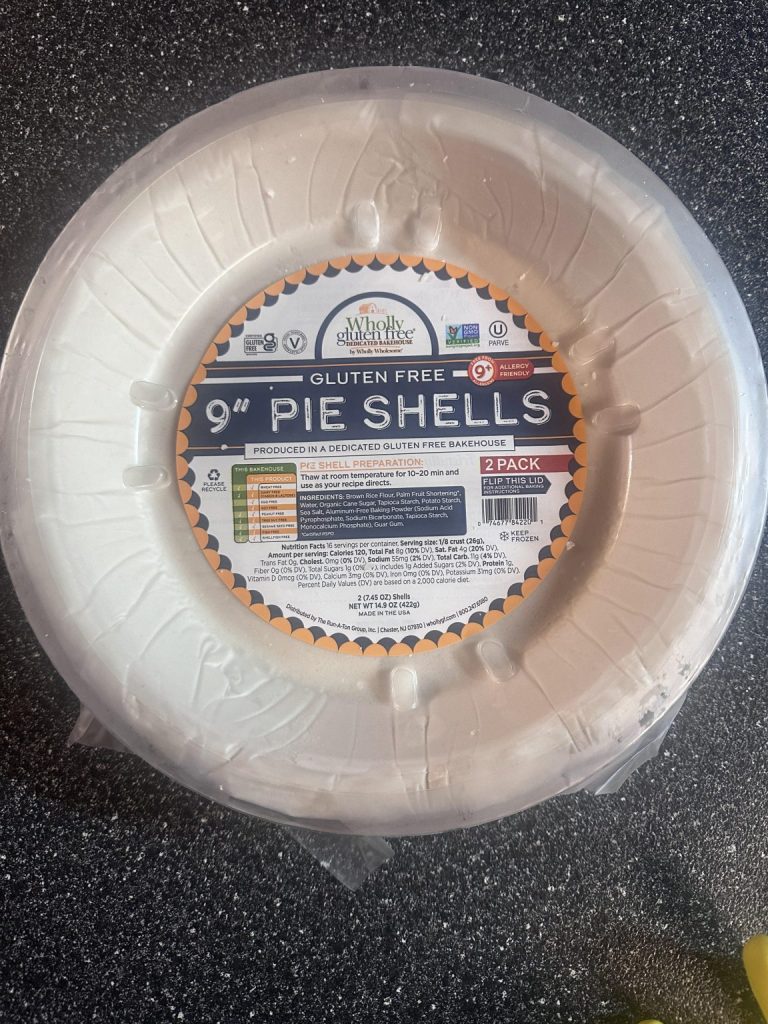
  • 1 frozen gluten-free pie crust
  • For the Filling
  • 1 can  no-sugar-added apple pie filling
  • ¼ cup Splenda
  • ½ teaspoon cinnamon
  • ½ teaspoon vanilla extract
  • ⅛ teaspoon almond extract
  • Optional:
  • ¼ teaspoon ground cardamom or ground ginger (adds extra warmth)
  • Almond Flour Topper
  • 1¼ cups almond flour
  • 2 tablespoons Splenda
  • 2½ tablespoons coconut oil
  • 1 large egg
  • ½ teaspoon vanilla extract
  • ¼ teaspoon cinnamon powder
  • Optional:
  • You may use the same almond flour mixture to make the bottom crust instead of using a frozen pie shell.

Method
 

  1. Defrost the frozen pie crust on the counter for about 15 minutes. If the pie crust comes in a foil pan, keep it in that pan and place it on a baking sheet. Remove all plastic wrapping.
  2. Prepare the Filling:
  3. In a bowl, combine the apple pie filling, Splenda, cinnamon, vanilla, and almond extract. Add the optional spices if desired.
  4. Spread the filling evenly into the unbaked crust.
  5. Make the Almond Flour Topper:
  6. In a bowl, whisk together the almond flour, Splenda, and cinnamon.
  7. Add the egg, vanilla extract, and coconut oil. Mix until a soft dough forms.
  8. Roll the dough between two sheets of parchment paper to about 1/8 inch thick.
  9. Remove the top sheet of parchment.
  10. Using a flower-shaped cookie cutter, cut out the center of the dough to create an opening. You can also use an adorable leaf-shaped cookie cutter.
  11. Carefully lift the dough using the bottom parchment sheet and place it over the cherry filling. Center the floral cut-out shape on the pie. Slowly peel away the parchment and trim the edges.
  12. With any leftover dough, roll out small pieces, cut additional floral shapes, and place them around the edge for a decorative border.
  13. Bake:
  14. Bake at 350°F for 40 minutes, or until lightly golden on top.
    Loosely cover the crust edges with foil if they brown too quickly.
    Allow to cool before slicing.

Notes

Recipe note:
  •  Fridge: Keep covered and eat within 2 days, since it uses a sugar substitute.
  • Thaw: Overnight in the refrigerator.
  • Freezer: Wrap tightly, whole or in individual slices, and use within 2 months for best quality.

Wishing you a cozy autumn filled with sweet moments. Happy baking! 🍎

With love,

Debra Roinestad
Debra Roinestad © The Comfy Cabin

Crispy Apple Phyllo Triangles with Raisins & Walnuts

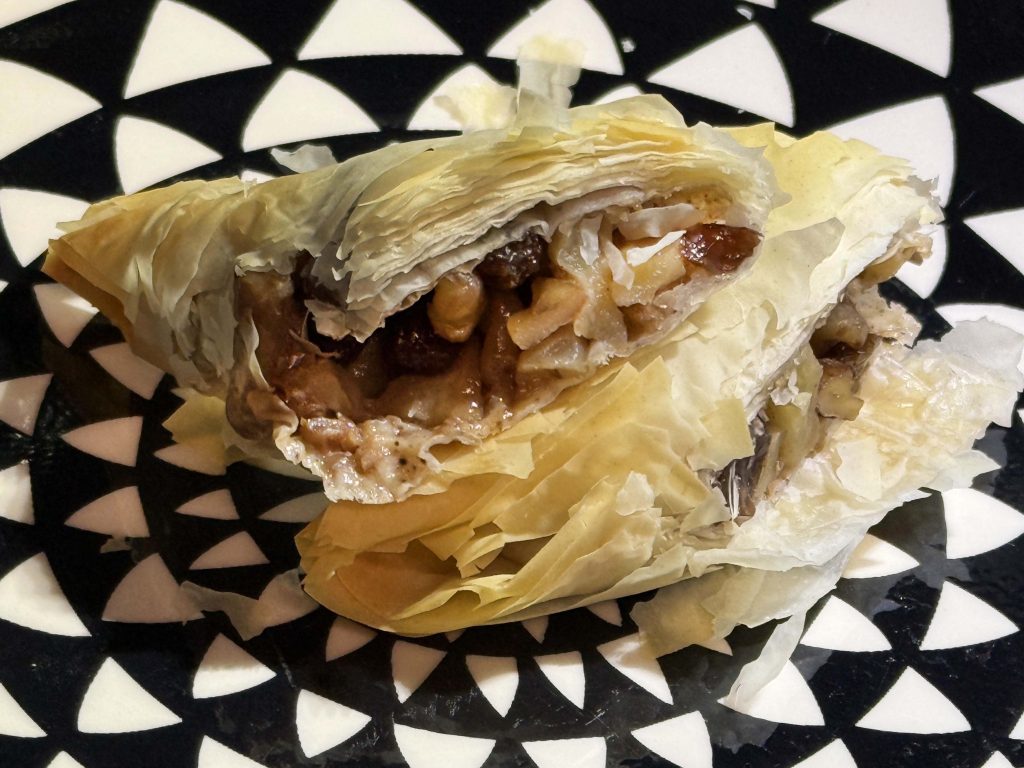
crispy apple phyllo triangles with raisins and walnuts
Crispy apple phyllo triangles with raisins and walnuts. Crispy apple phyllo triangles with raisins and walnuts. ©The Comfy Cabin, 2026

Last year, I shared my savory phyllo meat triangles, inspired by my grandmother’s kitchen. This autumn, I wanted to give those familiar golden triangles a sweet and seasonal twist.

Jump to Recipe

These crispy apple phyllo triangles are filled with warm apples, raisins, walnuts, and cinnamon. They are reminiscent of apple strudel but have a lighter, flakier pastry.

A touch of maple syrup brings everything together, while the delicate phyllo pastry becomes crisp and golden in the oven.

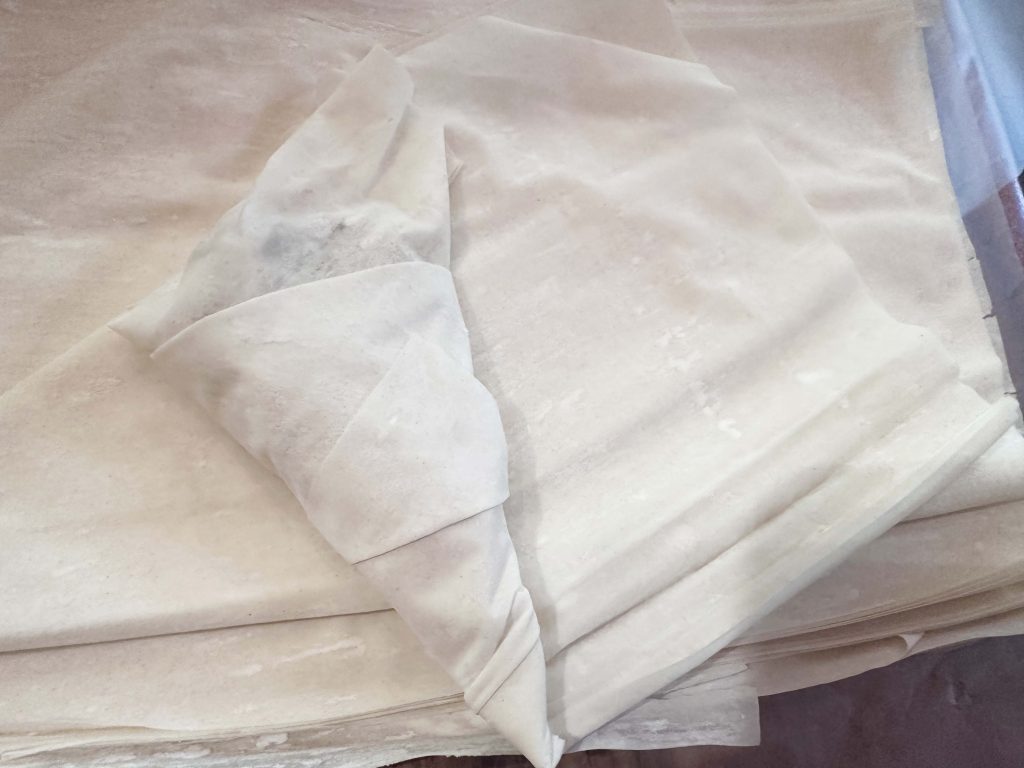
I used three layers of phyllo dough for each set of triangles, lightly brushing each layer with coconut oil. I then cut the stacked sheets in half and folded them into triangles—almost like folding a little flag. The result is light, flaky, and crisp on the outside, with a warm, cinnamon-spiced apple filling inside.

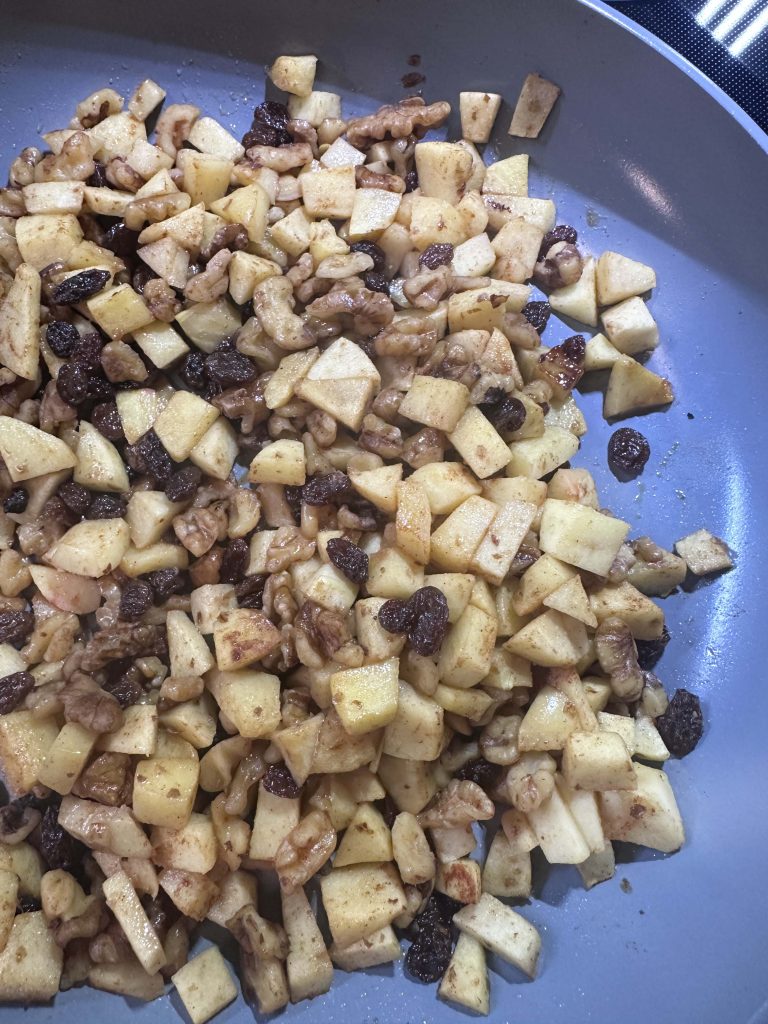
Warm apple, raisin, and walnut filling for crispy apple phyllo triangles. © 2026 The Comfy Cabin.

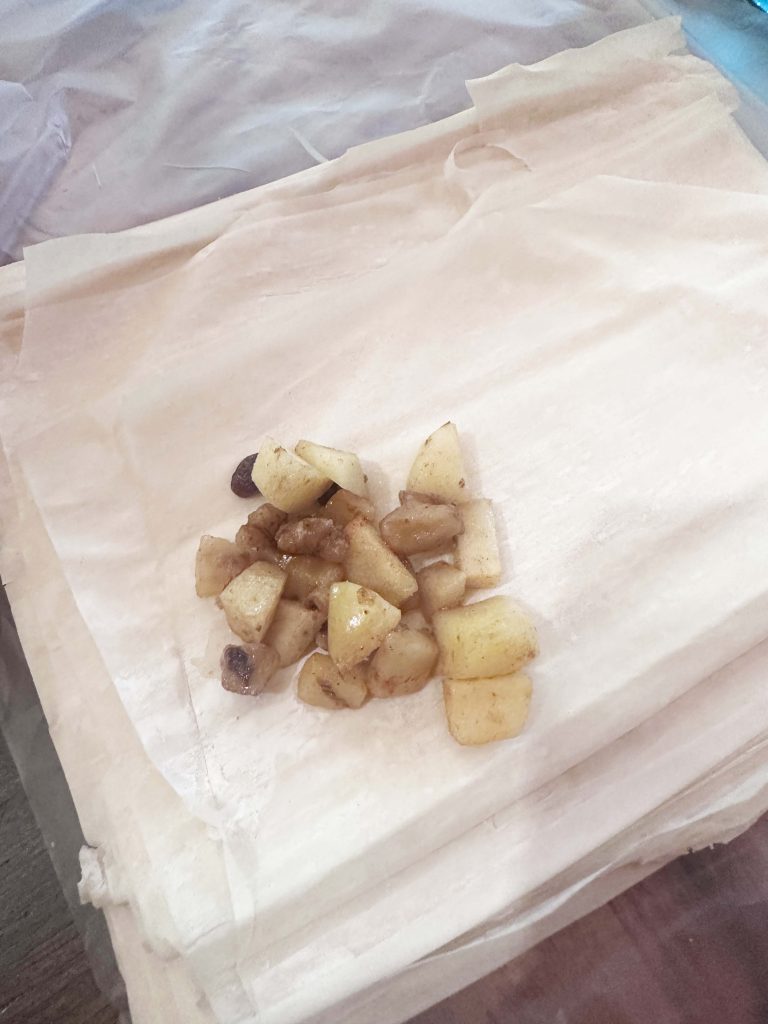
For the filling, I cooked 3 chopped apples with raisins, walnuts, cinnamon, Splenda, a little coconut oil and a small drizzle of maple syrup. Once the mixture cooled, I spooned it onto the phyllo and folded each strip into a triangle.

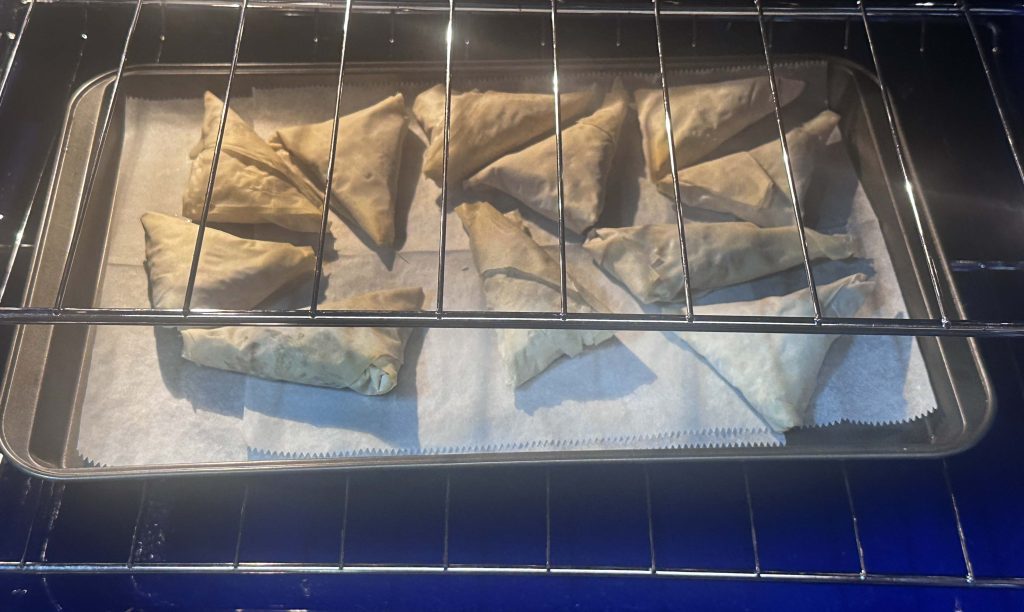
Apple phyllo triangles baking until crisp and golden. © 2026 The Comfy Cabin.

Bake at 350°F for about 25 minutes, or until the phyllo is beautifully golden and crisp. Since every oven is a little different, I like to check them about halfway through.

They make a lovely autumn dessert or afternoon treat with a warm cup of tea or coffee. Serve them fresh from the oven with a light dusting of cinnamon, a spoonful of Greek yogurt, or simply enjoy them on their own. They are a cozy way to celebrate apple season.

Happy Baking!

Debra Roinestad
Debra Roinestad © 2026 The Comfy Cabin.

Notes:

  • Best apples: Granny Smith, Honeycrisp, Gala, Pink Lady, or Braeburn work well because they hold their shape during baking. For a nice balance of sweet and tart, try using a combination of Granny Smith and Honeycrisp apples.
  • Alternatives: Sugar-free maple syrup may be used in place of regular maple syrup.
  • For sweeter triangles, add 1–2 tablespoons of Splenda, or your favorite sweetener, adjusting to taste. You may omit it entirely if the apples, raisins, and maple syrup provide enough sweetness.
  • Keep the unused phyllo covered while you work because those delicate sheets can dry out quickly.
  • Storage: Store cooled apple phyllo triangles in an airtight container in the refrigerator for up to 3 days. For longer storage, place them in an airtight freezer bag and freeze for up to 2 months.
  • For the best crispness, reheat refrigerated triangles in a 325°F oven for 5–10 minutes or in an air fryer at 300°F for about 5 minutes. Frozen triangles can go straight into the oven or air fryer; just allow a few extra minutes and check as they heat. Avoid microwaving if possible, as it may soften the phyllo.
The ComfyCabin

Crispy Apple Phyllo Triangles with Raisins & Walnuts

Crispy, flaky phyllo triangles filled with cinnamon-spiced apples, raisins, and walnuts, with a touch of maple syrup for a cozy autumn treat.
Prep Time 20 minutes
Cook Time 25 minutes
Total Time 45 minutes
Servings: 10 triangles
Course: Dessert
Cuisine: American

Ingredients
  

  • ½ package of phyllo dough Save the other half; phyllo dough usually comes in two packages per box.
  • 3 medium apples, peeled and diced— Honeycrisp or Gala apples
  • ½ cup chopped walnuts
  • ¼ cup raisins
  • 1 teaspoon ground cinnamon
  • 1 teaspoon vanilla extract
  • 1 teaspoon lemon juice
  • 2 tablespoons monk fruit or your preferred sweetener
  • 1 tablespoon maple syrup
  • 2-3 tablespoons melted coconut oil, for brushing
  • Optional: cinnamon or powdered sweetener for serving

Method
 

  1. Heat 1 teaspoon of coconut oil in a large skillet over medium-low heat. Add the diced apples, walnuts, raisins, cinnamon, vanilla, and lemon juice. Cook 5-7 minutes, until slightly softened.
  2. Add the maple syrup, remove from the heat, and allow the mixture to cool.
  3. Preheat the oven to 350°F (180℃). Line a baking sheet with parchment paper.
  4. Cut the defrosted phyllo dough in half. Stack the sheets together.
  5. Using three sheets of phyllo dough, place about 2 tablespoons of apple filling in one corner. Fold the bottom corner diagonally over the filling to form a triangle.
    Lightly brush with coconut oil to help seal it, then continue folding the triangle upward, as if folding a flag, until you reach the end of the strip. Seal the edge with coconut oil.
    Keep the remaining phyllo covered with a kitchen towel so it does not dry out.
  6. Place the phyllo triangle on the prepared baking sheet.
  7. Repeat with the remaining phyllo and filling. Arrange the triangles on the prepared baking sheet and lightly brush the tops with coconut oil.
  8. Bake for 25 minutes, or until the phyllo is crisp and golden brown. Because ovens vary, begin checking the triangles around the 15-minute mark.

Notes

Optional: For extra protein, serve with Greek yogurt for dipping.

Easy Cheesy Baked Black Beans —Quick & Delicious Recipe

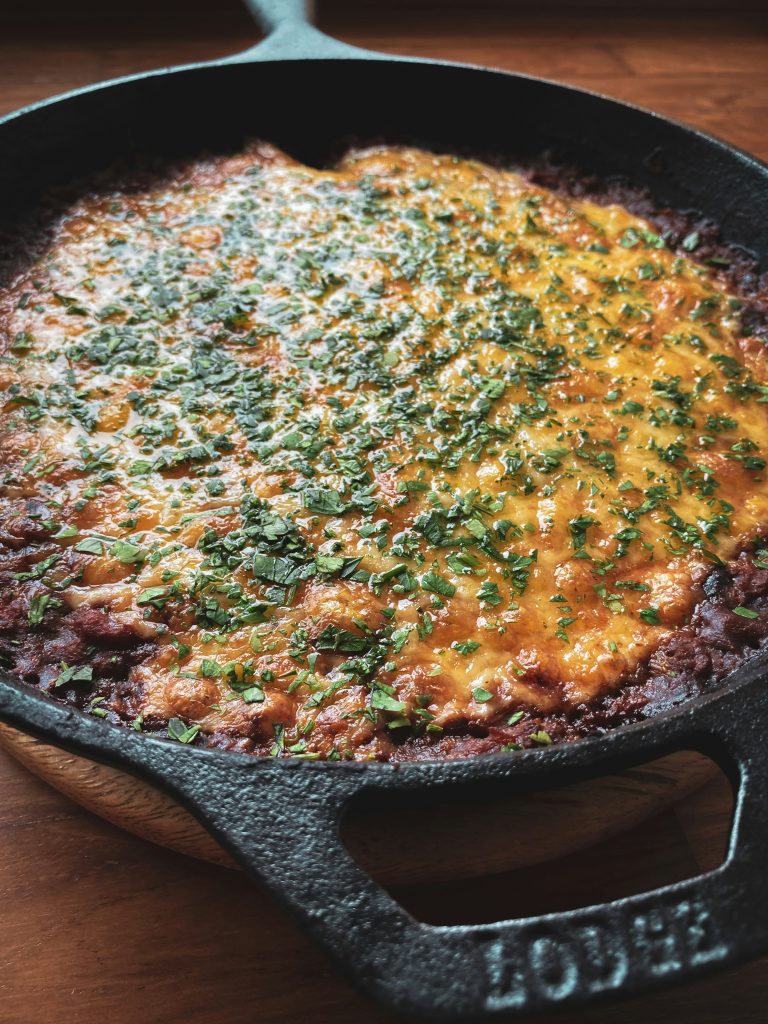
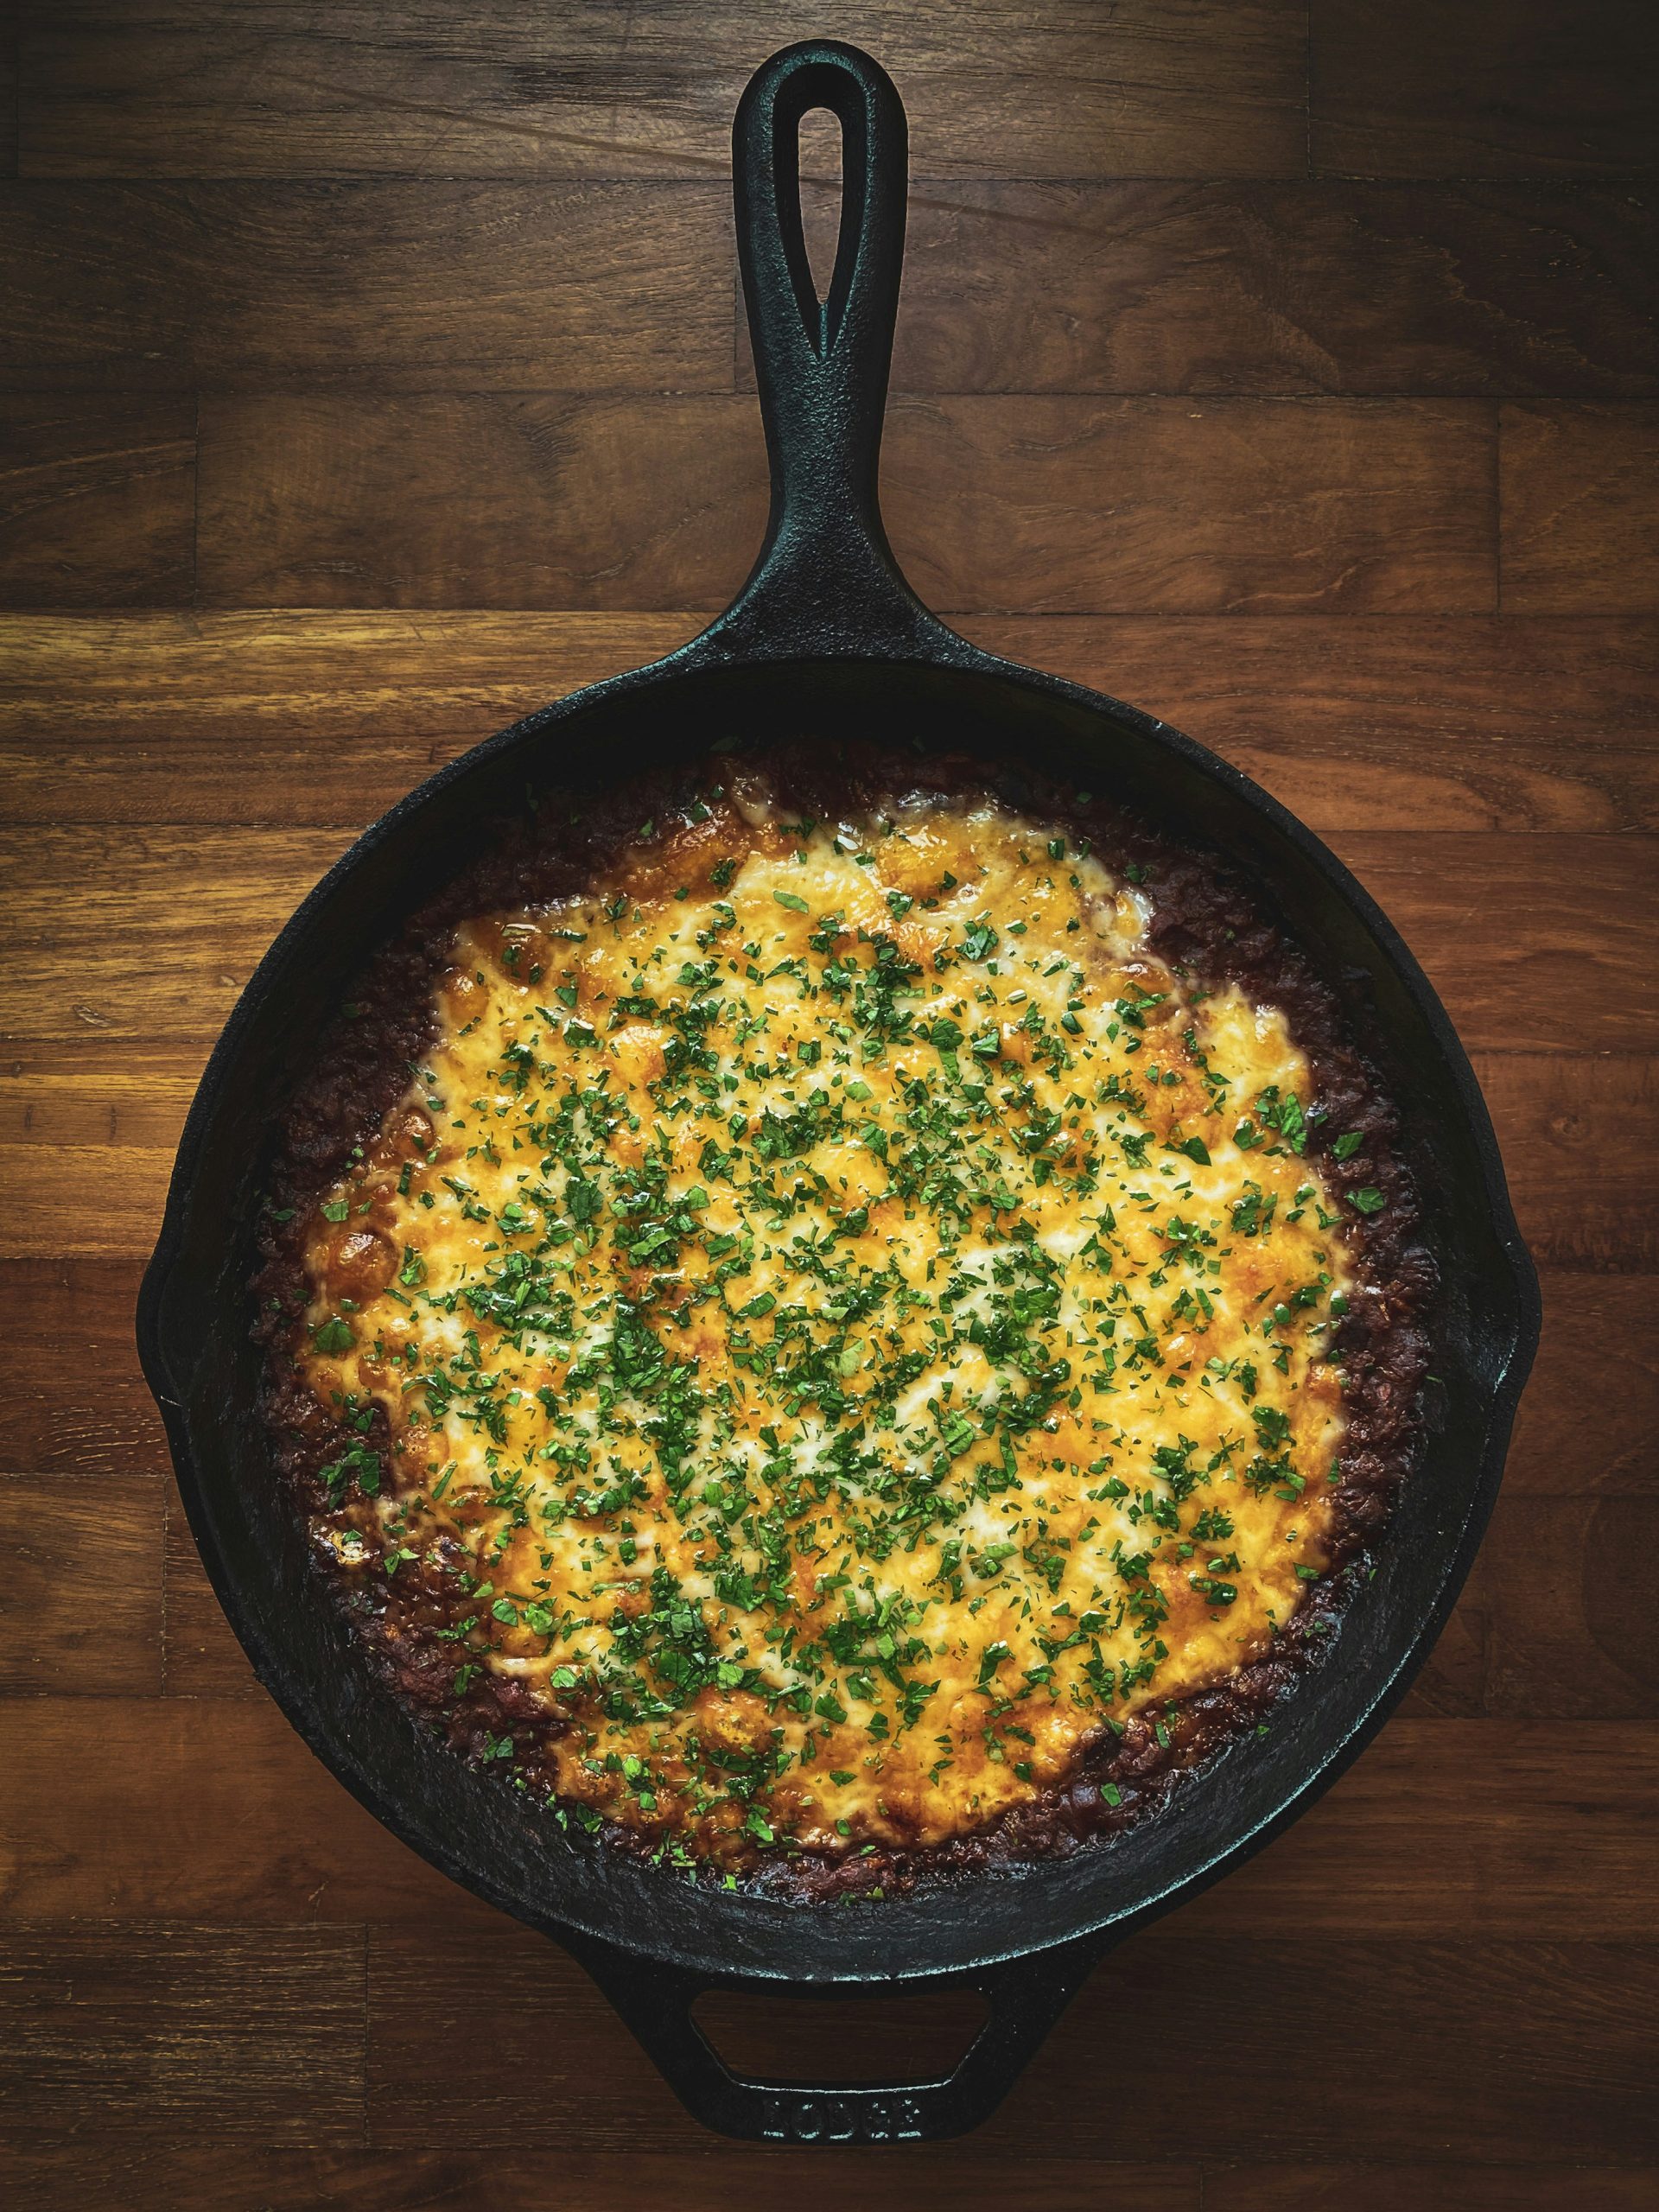
Sometimes, the simplest recipes are the most comforting! These Easy Cheesy Baked Black Beans are warm, hearty, slightly sweet, and topped with delicious melted Mexican cheese.

This is one of those easy dishes that requires very little preparation but delivers plenty of flavor. The combination of tender beans, a rich tangy sauce, a touch of sweetness, and gooey melted cheese makes this dish perfect for a cozy autumn afternoon.

Serve these cheesy baked beans alongside roasted vegetables, grilled chicken, or a slice of toasted bread. They’re also wonderful on their own for a quick, satisfying lunch.

And the best part? You can make this recipe with regular or sugar-free ketchup and maple syrup. Use whichever you prefer!

A little comfort, a little cheese, and a whole lot of homemade goodness!

Happy cooking! ❤️

With love,

Debra Roinestad
The Comfy Cabin

Easy Cheesy Baked Black Beans —Quick & Delicious Recipe

These easy cheesy baked black beans are sweet, smoky, and topped with melted Mexican cheese. Made with simple pantry ingredients, they're perfect for a cozy family meal or an easy side dish.
Prep Time 5 minutes
Cook Time 35 minutes
Total Time 40 minutes
Servings: 6 people
Course: Side Dish
Cuisine: American

Ingredients
  

  • 2 cans (15 oz) each black beans, drained and rinsed
  • ½ cup ketchup
  • 2 tablespoons maple syrup
  • 1 tablespoon brown sugar or your favorite sugar substitute
  • 1 tablespoon yellow mustard
  • 1 teaspoon Worcestershire sauce
  • ½ teaspoon onion powder
  • ½ teaspoon smoked paprika
  • ¼ teaspoon garlic powder
  • ¾ cup shredded Mexican cheese
  • 1 tablespoon parsley or fresh parsley, chopped (optional)

Equipment

  • skillet or baking dish
  • mixing bowl
  • mixing spoon
  • Aluminum foil
  • measuring cups and spoons

Method
 

  1. Preheat the oven to 350°F (175°C).
  2. Drain and rinse the black beans, then transfer them to a small baking dish.
  3. In a separate bowl, combine the ketchup, maple syrup, brown sugar, mustard, Worcestershire sauce, onion powder, smoked paprika, garlic powder.
  4. Pour the sauce over the beans and gently stir until everything is evenly coated.
  5. Cover the baking dish with aluminum foil and bake at 350℉ for 30 minutes.
  6. Remove the foil, sprinkle ¾ cup of shredded Mexican cheese over the beans, and bake uncovered for another 5 minutes.
  7. Allow the beans to rest for approximately 5 minutes before serving. Garnish with parsley, if desired.
  8. Baking Tip: Every oven is different, so check your beans halfway through baking and adjust the cooking time as needed. Keep an eye on the cheese during the final few minutes to ensure it melts perfectly without overbrowning.

Notes

Kitchen Tip ❤️
Feel free to use whatever beans or cheese you have in your pantry. You can also adjust the sweetness to suit your taste.
Leftover Storage
Allow the cheesy baked black beans to cool slightly before transferring them to an airtight container. Refrigerate promptly and enjoy within 3–4 days.
Reheating
Warm in the microwave or oven until heated thoroughly. Add a splash of water if needed to keep the beans moist.
Freezing
Freeze for up to 2–3 months. For the best texture, freeze without the cheese and add fresh cheese when reheating.

High Protein Cowboy Cookies –Chunky, Chewy & Butter-Free

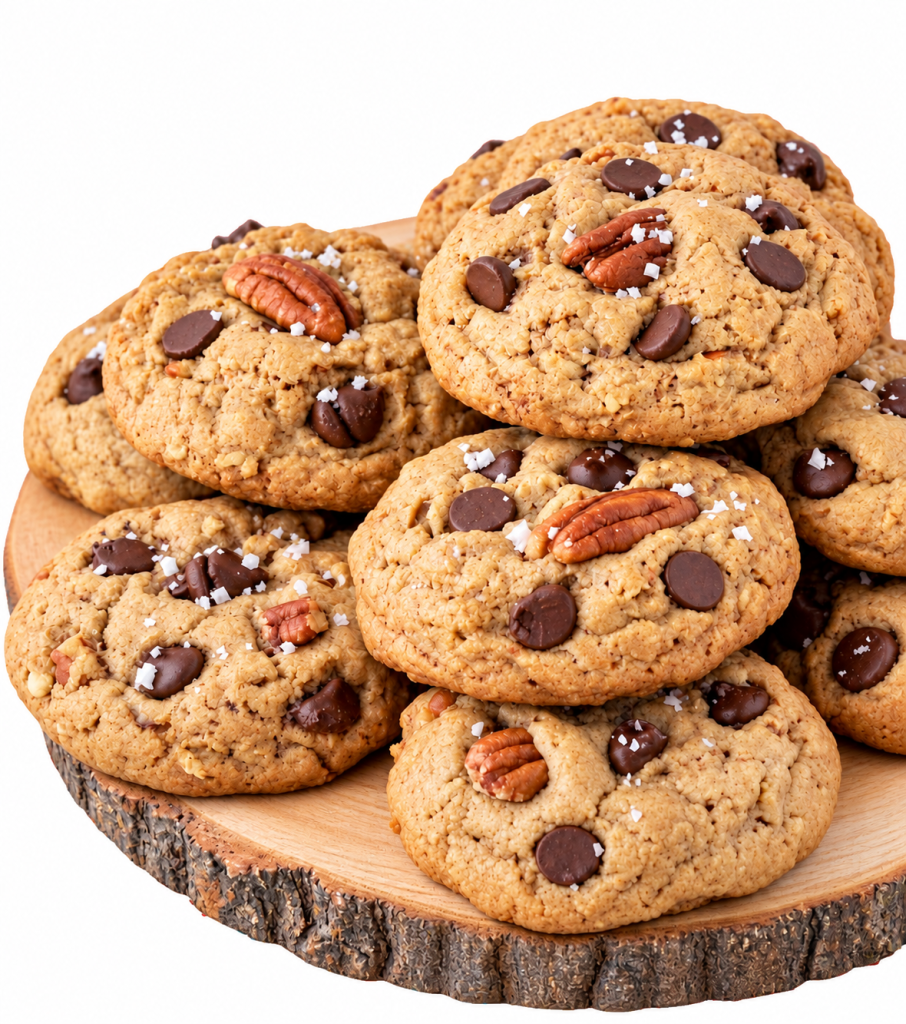
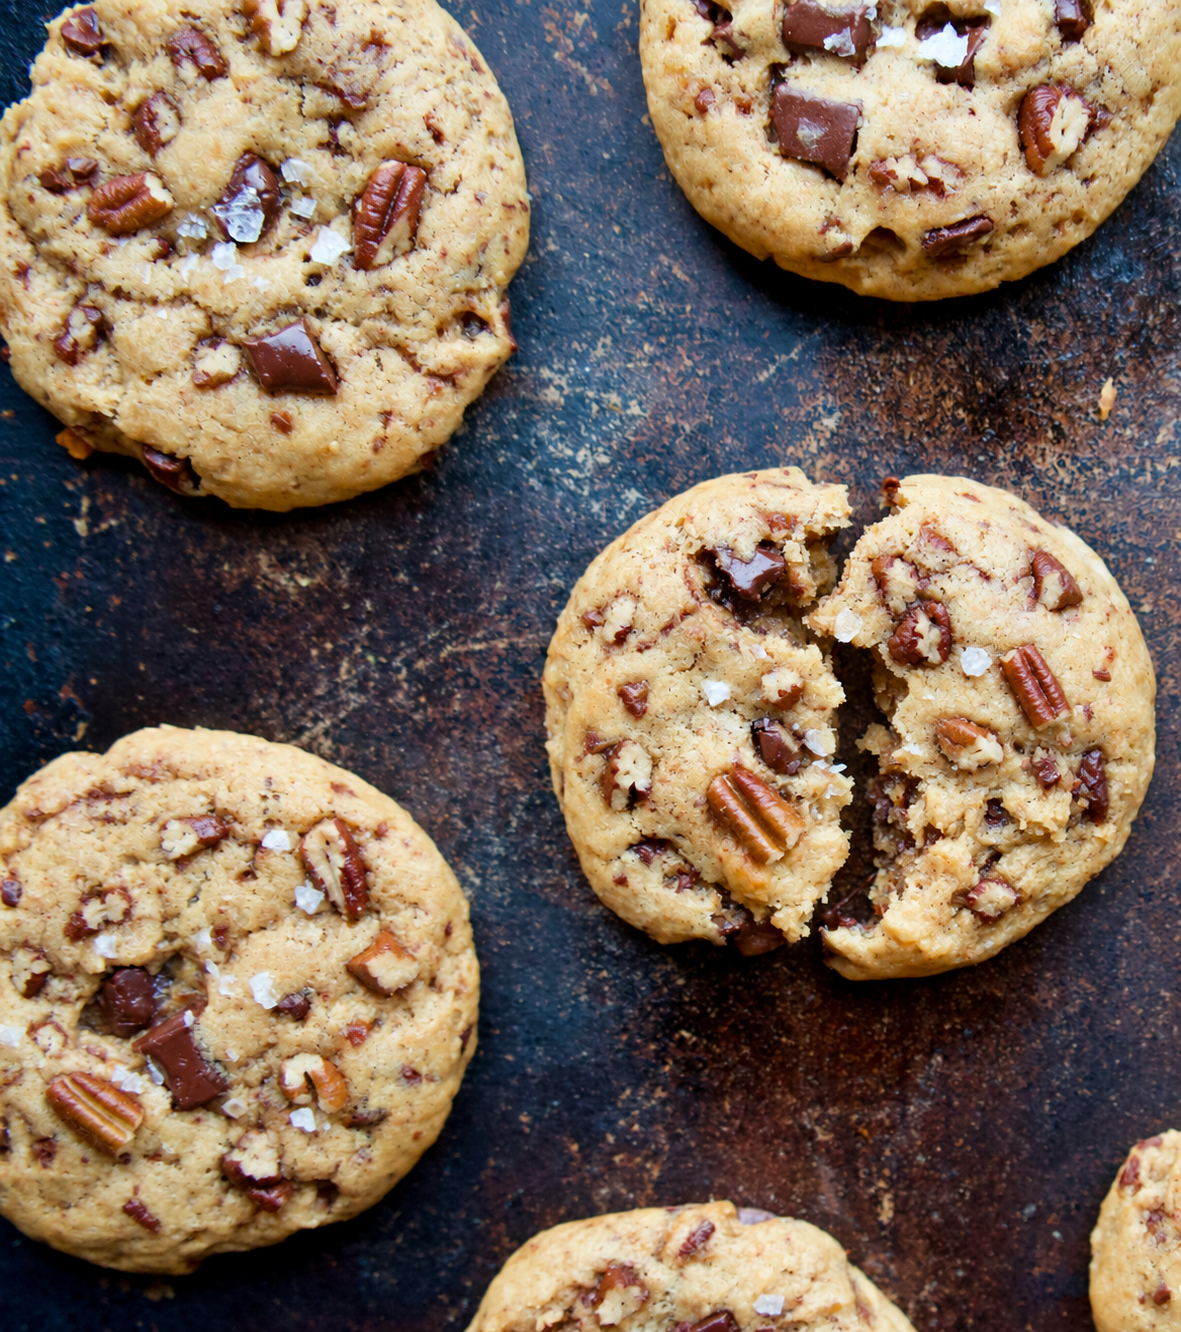
If you love a thick, chewy cookie loaded with chocolate and pecans, these High Protein Chunky Cowboy Cookies are such a satisfying treat. They’re made without butter and include oats, almond flour, Greek yogurt, and protein powder for a little extra staying power.

What I especially love about these cookies is the texture. They’re soft and chewy in the center with plenty of chocolate chips and crunchy pecans in every bite. Pressing a few extra chocolate chips and pecans into the tops before baking also gives them that big, bakery-style chunky look.

They’re simple to make, perfect with a cup of coffee or tea, and they make a cozy snack when you want something sweet without making a traditional butter-heavy cookie.

High Protein Cowboy Cookies – Chunky, Chewy & Butter-Free

Big, chewy, butter-free cowboy cookies packed with oats, chocolate chips, pecans, and extra protein.
Prep Time 15 minutes
Cook Time 15 minutes
Total Time 30 minutes
Servings: 10 cookies
Course: Dessert
Cuisine: American

Ingredients
  

  • 1 cup old-fashioned rolled oats
  • ½ cup almond flour
  • ¼ cup vanilla or unflavored protein powder
  • ½ teaspoon baking soda
  • ½ teaspoon baking powder
  • ½ teaspoon cinnamon
  • 1 large egg
  • ½ cup plain Greek yogurt
  • ⅓ cup Spledna or your favorite sweetener
  • 1 teaspoon vanilla extract
  • ⅓ cup sugar-free or reduced-sugar chocolate chips
  • ⅓ cup chopped pecans
  • pinch of salt
  • optional:
  • Extra chocolate chips and pecans for the tops, optional

Method
 

  1. Preheat the oven to 350°F and line a baking sheet with parchment paper.
  2. In a medium bowl, combine the oats, almond flour, protein powder, baking soda, baking powder, cinnamon, and salt.
  3. In a separate bowl, whisk together the egg, Greek yogurt, brown sweetener, and vanilla.
  4. Add the wet ingredients to the dry ingredients and stir until everything is well combined.
  5. Fold in the chocolate chips and chopped pecans.
  6. Let the dough rest for 5–10 minutes. This helps the oats absorb some of the moisture and makes the dough easier to shape.
  7. Scoop about 2 1/2–3 tablespoons of dough per cookie onto the prepared baking sheet.
  8. Gently flatten each cookie until it is about 3 inches wide. Because these cookies are butter-free, they won’t spread very much on their own.
  9. Press a few extra chocolate chips and pecan pieces into the tops for that chunky bakery-style finish.
  10. Bake for 13–16 minutes, or until the edges are set and the centers are just lightly golden.
  11. Let the cookies cool on the baking sheet for about 10 minutes before moving them.
  12. Note: For even bigger bakery-style cookies: Double the recipe and scoop larger portions of dough for extra-thick, chunky cookies. You may need to add a few extra minutes to the baking time, so watch for set edges and soft centers.
Debra Roinestad
Debra Roinestad

Easy Air Fryer Cinnamon Apples—Warm & Healthy Fall Recipe

This easy air fryer cinnamon apple recipe is one of those simple treats that tastes comforting and indulgent without requiring much work.

The apples become warm and tender in the air fryer while the cinnamon creates that wonderful apple-pie flavor. I like making these when I’m craving something sweet but don’t necessarily want to bake an entire dessert. They’re delicious on their own, but you can also spoon them over Greek yogurt, oatmeal, cottage cheese, or even a small scoop of vanilla ice cream.

Air Fryer Cinnamon Apples

Ingredients

  • 2 apples, peeled or unpeeled and sliced
    (Honeycrisp, Gala, Fuji, or your favorite)
  • 1 teaspoon ground cinnamon
  • 1–2 teaspoons maple syrup, honey, brown sugar, monk fruit sweetener, or sweetener of choice
  • 1 teaspoon melted butter, olive oil, or melted coconut oil
  • ½ teaspoon vanilla extract
  • ¼ teaspoon nutmeg, optional
  • 1–2 tablespoons vanilla protein powder, optional (for an extra boost of protein)

Directions

Preheat the air fryer to 350°F. (175℃) Toss the sliced apples with the cinnamon, sweetener, melted coconut oil, and vanilla until evenly coated.

Place the apples in the air fryer basket and cook for 8–10 minutes, gently tossing them about halfway through. For softer apples, add another 2–3 minutes.

Serve them warm and enjoy!

The Comfy Cabin

Easy Air Fryer Cinnamon Apples – Warm & Healthy Fall Recipe

Simple ingredients. Big flavor. A cozy treat ready in minutes!
Prep Time 5 minutes
10 minutes
Total Time 15 minutes
Servings: 4 people
Course: Breakfast, Dessert
Cuisine: American
Calories: 90

Ingredients
  

  • 2 apples, peeled or unpeeled and sliced (Honeycrisp, Gala, Fuji, or your favorite)
  • 1 teaspoon ground cinnamon
  • 1-2 teaspoons maple syrup, honey, brown sugar, monk fruit sweetener, or sweetener of choice
  • 1 teaspoon melted butter, olive oil, or melted coconut oil
  • ½ teaspoon vanilla extract
  • ¼ teaspoon ground nutmeg, optional
  • 1-2 tablespoons vanilla protein powder, optional (for an extra boost of protein)

Method
 

  1. Prepare Apples:
  2. Wash and core the apples. Cut into ½ inch wedges.
  3. Season:
  4. In a bowl, toss apples with coconut oil (or choice of oil) maple syrup, ground cinnamon, nutmeg, vanilla extract.
  5. Air Fry:
  6. Preheat the air fryer fto 350℉ (175℃) for 2 minutes. Place the apples in the air-fryer basket.
  7. Cook:
  8. Air fry at 350℉ (175℃) for 8-10 minutes, shaking the basket halfway through. Apples should be tender and lightly caramelized.
  9. Serve:
  10. Serve warm! Enjoy as is, or top with Greek yogurt, oatmeal, ice cream, or a drizzle of nut butter.

Notes

Delicious Variations:
  • Add 1 tablespoon chopped pecans or walnuts before frying.
  • Add a squeeze of lemon juice for brightness.
  • Sprinkle with a little brown sugar for extra sweetness.
  • Also tastes delicious with sugar-free caramel sauce-from Skinny Syrup brand.
Extra Tips:
  • For softer apples, cook 1-2 minutes longer.
  • For extra sweet flavor, add a few raisins.
  • You can store your apples for up to 5 days in the refrigerator in an air tight container. 
  • You can also freeze left over apples for up to 2 months.
  • Perfect for breakfast, dessert, or a snack.

Tip: Sprinkle a few chopped walnuts or pecans over the warm apples for a little crunch. They also make a lovely topping for a protein-rich yogurt bowl.

Note: Air fryers are not all created equal. Check on the apples at the halfway mark.

Sometimes the simplest recipes are the ones that make fall feel especially cozy. 🍎🍁

Debra Roinestad

Pumpkin Spice & Fall Wildlife: Cozy Sips, Wild Neighbors

There is something about the end of summer that makes me start looking for little signs of fall everywhere. The mornings feel a bit different, the woods seem quieter in their own way, and suddenly pumpkin spice starts sounding good again. Even when the afternoons are still warm, my mind is already wandering toward cozy sweaters, warm mugs, falling leaves, and all the wildlife getting ready for the changing season.

Around the cabin, the animals do not need a pumpkin spice latte to know autumn is coming. They seem to have their own little seasonal calendar.

Deer may start becoming more active as the temperatures slowly cool.
You might notice them appearing earlier in the evening or wandering through familiar trails more often. This is also an important time for them nutritionally, because they are taking advantage of natural foods such as acorns, berries, grasses, leaves, and other plants while they are available. Our cameras have captured deer quietly passing through, wild turkeys exploring, squirrels going about their very important squirrel business, and black bears making appearances of their own.

Photo by Benjamin Raffetseder

Squirrels are another sure sign that fall is getting closer.
They suddenly seem very busy, racing through the trees and across the ground with nuts in their mouths. Squirrels often cache food, which means they hide nuts and seeds in different places so they can return to them later. Of course, they do not always remember every hiding spot, which actually helps the forest. Forgotten nuts can sometimes grow into new trees. So that frantic little squirrel burying an acorn may accidentally be planting part of tomorrow’s woods.

Photo by Kylli Kittus

Wild turkeys are fun to watch this time of year too …
They spend much of their day walking and scratching through the forest floor looking for seeds, insects, berries, nuts, and other natural foods. When a group of turkeys wanders through the yard, they always look as though they have somewhere extremely important to be.

Photo by Tyler Moulton

And Then There Are the Bears…

Fall is an especially important feeding season for black bears. During this period, bears can spend a great deal of time searching for calorie-rich foods as they prepare for the colder months ahead.

That can include acorns, nuts, berries and other natural foods—but it also means human food sources can be particularly tempting.

If you live in bear country, this is a good time to be extra careful about securing garbage, pet food, grills and other things that might attract a curious bear.

Around here, seeing one on the wildlife camera certainly gets our attention. No pumpkin spice required.

Photo by Pete Nuij
Video by Debra Roinestad, The Comfy Cabin. Music: ‘Panic’ by The Smiths.

Now for Our Pumpkin Spice

The animals have their acorns, berries and seeds.

We have pumpkin spice. 🧡

The Comfy Cabin Pumpkin Spice Latte

Ingredients

  • ½ cup whole milk
  • 1 tablespoon pumpkin purée
  • 1½ tablespoons granulated sugar
  • ½ teaspoon vanilla extract
  • ½ teaspoon pumpkin pie spice
  • 1 cup brewed coffee
  • ¼ cup vanilla creamer
  • Whipped cream, for topping
  • Extra pumpkin pie spice, for sprinkling

To make it: Combine the milk, pumpkin purée, sugar, vanilla and pumpkin pie spice and whisk or froth until smooth and warm. Stir in the brewed coffee and vanilla creamer.

Pour it over ice for an iced pumpkin spice latte, or keep it warm for a cozy hot version. Finish with whipped cream and an extra sprinkle of pumpkin pie spice.

Cabin Tip: Make it your own. You can substitute almond milk or oat milk and use your favorite sweetener to suit your taste.

Maybe that’s what I enjoy most about this time of year. Fall doesn’t arrive in the woods all at once. It sneaks in. So grab a warm mug, watch a little wildlife, and enjoy this beautiful season.

Sip slow. Breathe deep. Enjoy the woods. 🍂☕🦌🐿️🦃🐻

Trail Cam Videos by Debra Roinestad, The Comfy Cabin. Music: ‘Stasis’ by Oakvale Of Albion, ‘Smile For Me’ by Pavlo Butorin

Debra Roinestad

Vegetarian Chicken & Dumplings with Daring Plant-Based Chicken— A Tribute to Dolly Parton 

In Memory of Dolly Parton

Like so many people, I’ve been thinking about Dolly Parton and the joy, kindness and warmth she brought into the world.

Dolly loved Southern comfort food, and chicken and dumplings was one of the dishes she was especially known for. In her memory, I wanted to make something a little different here at The Comfy Cabin — a vegetarian version of Southern Chicken & Dumplings made with Daring plant-based chicken. ❤️ 🌿

It’s warm, comforting and inspired by the kind of simple Southern cooking that Dolly loved, with a vegetarian twist from my own kitchen.

Some people leave behind songs. Some leave behind stories. Dolly left us both — along with a reminder to be generous, laugh often and put a little more kindness into the world.

This recipe is made with love in her memory. ❤️ 🦋

The Comfy Cabin

Vegetarian Southern Chicken & Dumplings

Prep Time 20 minutes
Cook Time 30 minutes
Total Time 50 minutes
Servings: 4 people
Course: Soup, Main Course
Cuisine: American, Southern

Ingredients
  

  • For the Daring Chicken & Broth
  • 1 package Daring Original Plant Chicken Pieces
  • 1 tablespoon olive oil
  • ½ small onion, finely chopped
  • 2 medium carrots, peeled and thinly sliced or diced
  • 2 celery stalks, sliced
  • 5 cups vegetable broth
  • ½ teaspoon garlic powder
  • ½ teaspoon poultry seasoning
  • ¼ teaspoon teaspoon dried thyme
  • ¼ cup unsweetened plant milk, optional, for a creamier broth
  • salt and freshly ground black pepper, to taste
  • fresh parsley, chopped, for garnish
  • For the Dumplings
  • 2 cups all-purpose flour
  • ½ teaspoon baking soda
  • ½ teaspoon salt
  • 3 tablespoons vegetable shortening
  • ¾ cup plant-based buttermilk
  • For homemade plant-based buttermilk, combine ¾ cup unsweetened plant milk with 2 teaspoons lemon juice. Let stand for about 5 minutes.

Equipment

  • Large pot
  • skillet
  • mixing bowl
  • Rolling Pin

Method
 

  1. Brown the Daring chicken. Heat the olive oil in a skillet over medium heat. Cook the Daring chicken according to the package directions until lightly golden. Remove from the skillet and set aside.
  2. Cook the vegetables. Add the onion, carrots and celery to a large pot. Sauté for about 5–7 minutes, until the onion is translucent and the carrots and celery begin to soften.
  3. Make the broth. Pour in the vegetable broth. Add the garlic powder, poultry seasoning, thyme, salt and pepper. Bring to a gentle simmer.
  4. Make the dumplings. In a mixing bowl, whisk together the flour, baking soda and salt. Cut in the vegetable shortening until the mixture resembles coarse crumbs.
  5. Gradually stir in the plant-based buttermilk until a soft dough forms. Be careful not to overmix.
  6. Turn the dough onto a lightly floured surface. Gently roll it out and cut it into rustic strips or small pieces.
  7. Cook the dumplings. Bring the broth to a gentle boil and add the dumplings a few at a time. Reduce the heat and simmer for approximately 10–15 minutes, or until the dumplings are tender and cooked through.
  8. Add the Daring chicken. Gently stir the browned plant chicken into the pot during the final 3–5 minutes of cooking. This helps it retain its texture.
  9. For a creamier broth, stir in the plant milk at the end. Taste and adjust the salt and pepper.
  10. Spoon into bowls and finish with fresh parsley and a little cracked black pepper.

Notes

🦋 Comfy Cabin Note 🦋
This isn’t Dolly Parton’s original chicken and dumplings recipe. It’s my vegetarian interpretation of a Southern comfort-food classic, created as a small tribute to Dolly and the warmth, music and Southern traditions she shared with generations of us.
Serve it warm, put on a favorite Dolly song, and enjoy a comforting little taste of the South. ❤️

🦋 Comfy Cabin Note 🦋

This isn’t Dolly Parton’s original chicken and dumplings recipe. It’s my vegetarian interpretation of a Southern comfort-food classic, created as a small tribute to Dolly and the warmth, music and Southern traditions she shared with generations of us.

Serve it warm, put on a favorite Dolly song, and enjoy a comforting little taste of the South.

Lots of Love, ❤️
Debra Roinestad

High-Protein Greek Yogurt Cheesecake with Homemade Nut Crust

High-Protein Greek Yogurt Cheesecake © The Comfy Cabin, 2026

Lately, I’ve been seeing Greek yogurt recipes made with pudding mix trending all over social media, and of course, I had to give one a try! I loved the idea of combining creamy Greek yogurt with pudding mix to create a simple dessert, so I decided to add my own little twist and turn it into a cheesecake.

For my version, I use my homemade nut pie crust, made with finely ground nuts, coconut oil, sweetener, and an optional egg white. The crust is baked for just 15 minutes, giving it a lightly golden, nutty crunch that pairs beautifully with the creamy cheesecake filling.

The nuts were finely ground in a blender before making the crust. © The Comfy Cabin, 2026
Homemade Nut Pie Crust before baking. © The Comfy Cabin, 2026

If you want to make things even easier, you can simply purchase a premade crust that suits your taste.

Once the crust has completely cooled, there’s no baking required for the cheesecake filling. Creamy Greek yogurt and zero-sugar cheesecake pudding mix come together to create a thick, delicious filling with classic cheesecake flavor.

After adding the filling to the cooled crust, simply refrigerate the cheesecake for at least 4 hours, or until it’s nicely chilled and set. For the best texture and clean slices, refrigerate overnight.

Top it with fresh strawberries, blueberries, or chopped nuts. There are so many ways to make this recipe your own! 😊

High-Protein Greek Yogurt Cheesecake. © The Comfy Cabin, 2026

I love finding recipes that inspire me and then heading into the kitchen to put my own spin on them. Sometimes a trending idea is just the beginning of creating something new.

High-Protein Greek Yogurt Cheesecake with Homemade Nut Crust

Prep Time 15 minutes
Cook Time 15 minutes
Total Time 4 hours 30 minutes
Servings: 6

Ingredients
  

  • For the Nut Pie Crust:
  • 1½ cups ground nuts: (almonds, pecans, walnuts, or a mix)
  • 2 tablespoons coconut oil
  • 2 tablespoons Splenda or your favorite sweetener
  • pinch of salt
  • 1 egg white (optional, for binding and crispness) I omitted the egg whites this time and simply pressed the nuts mixture down with a spoon to form the crust.
  • For the Cheescake Filling:
  • 2 cups Greek Yogurt or Vanilla Yogurt
  • 1 package (1 oz) Jell-O-Zero Sugar Cheesecake pudding mixture Regular cheesecake pudding mixture works as well.
  • ½ cup almond milk
  • 1 teaspoon vanilla extract
  • 2 tablespoons Splenda or your favorite sweetener
  • ½ cup strawberries or blueberries

Method
 

  1. For the Nut Pie Crust:
  2. Preheat oven to 350℉ (175℃).
  3. In a bowl, mix ground nuts, coconut oil, sweetener, and salt.
  4. Optional: For extra structure, mix in 1 lightly beaten egg white.
  5. Using the back of a spoon, press the nut mixture evenly into a 6×6-inch pie pan, pressing it up the sides as well.
  6. Bake for 12-15 minutes, or until golden and set.
  7. Let it cool completely before adding your filling.
  8. For the Cheescake Filling:
  9. In a bowl, whisk together the Greek yogurt and cheesecake mix until smooth.
  10. Add the vanilla extract and Splenda.
  11. Gradually add the almond milk, mixing gently until fully combined.
  12. Spoon the filling over the prepared crust and smooth the top with a spatula.
  13. Refrigerate for at least 4 hours before removing the springform ring. For the best texture and clean slices, refrigerate overnight.

I hope you enjoy this one as much as I do!
Happy cooking! 💚
Warm Regards,
Debra

Debra Roinestad

Easy High Protein Almond Flour Blueberry Cookies

These almond flour blueberry cookies have quickly become a family favorite in our home. They’re soft, lightly sweet, and packed with juicy blueberries in every bite. I love that they feel like a treat while still being made with simple ingredients like almond flour, protein powder, and fresh fruit.

They’re especially good when you want something sweet without making a traditional batch of sugary cookies. The almond flour gives them a tender texture, while the blueberries add little bursts of natural sweetness. I also like adding a touch of lemon zest when I have it on hand—it pairs beautifully with the blueberries.

Best of all, they’re easy to make and only require a few minutes of prep. Enjoy one with your morning coffee, as an afternoon snack, or whenever you’re craving a cozy homemade treat.

Debra Roinestad
The Comfy Cabin

Easy High Protein Almond Flour Blueberry Cookies

Prep Time 10 minutes
Cook Time 30 minutes
Total Time 40 minutes
Course: Breakfast, Dessert, Snack
Cuisine: American

Ingredients
  

  • 1 cup almond flour
  • 1 scoop unflavored or vanilla protein powder- I used Isopure protein powder
  • ⅓ cup Splenda or your favorite sweetener (adjust to taste)
  • 1 teaspoon baking powder
  • 1 large egg
  • 1 teaspoon vanilla extract
  • 1 tablespoon coconut oil
  • 1-2 tablespoons almond milk
  • ½ cup fresh blueberries
  • pinch of salt

Method
 

  1. Preheat the oven to 350°F (175°C).
  2. Line a baking sheet with parchment paper.
  3. In a medium bowl, whisk together the almond flour, protein powder, sweetener, baking powder, and salt.
  4. Stir in the egg, vanilla, and coconut oil until a dough forms.
  5. If the dough seems dry, add almond milk 1 tablespoon at a time until it holds together.
  6. Gently fold in the blueberries, being careful not to crush them.
  7. Scoop about 2 tablespoons of dough per cookie onto the baking sheet. Slightly flatten each cookie.
  8. Bake for 25-30 minutes, or until the edges are lightly golden.
  9. Let cool on the baking sheet for 10 minutes before transferring to a wire rack.

Notes

  • Makes 9-10 cookies. These cookies are soft rather than crispy because of the almond flour and protein powder.
  • For extra flavor, sprinkle a little cinnamon or add a teaspoon of lemon juice to the dough.
  • These cookies pair well with a protein shake if you’re looking for a higher-protein breakfast or snack.
Storage
  • Refrigerator: Up to 5 days in an airtight container.
  • Freezer: Up to 3 months. Thaw overnight in the refrigerator or microwave for 15–20 seconds before enjoying.
 

Easy Creamy Greek Yogurt Cucumber Salad Recipe

There are some recipes that never go out of style, and creamy cucumber salad is definitely one of them. It’s cool, crisp, refreshing, and comes together in just a few minutes. Whether you’re serving it alongside grilled chicken, burgers, fish, or simply enjoying it as a light lunch, this easy salad is always a favorite.

I love giving the traditional recipe a little healthier twist by using creamy Greek yogurt instead of relying entirely on sour cream. It adds extra protein while still creating that rich, tangy dressing we all love. A touch of mayonnaise keeps the dressing silky smooth, while fresh dill brings everything together with bright garden flavor.

If you’re planning a summer picnic, backyard barbecue, or simply looking for an easy make-ahead side dish, this recipe belongs on your table.

Why You’ll Love This Recipe

● Crisp, cool, and refreshing.

● Ready in about 15 minutes.

● High in protein thanks to Greek yogurt.

● Perfect for cookouts and family dinners.

● Easy to customize with your favorite vegetables.

● Even better after chilling in the refrigerator.

How to Store Leftovers

Store any leftovers in an airtight container in the refrigerator for up to 2–3 days. Because cucumbers naturally release water, you may notice a little liquid in the container. Simply give the salad a gentle stir before serving again.

I don’t recommend freezing this recipe since the cucumbers lose their crisp texture once thawed.

What to Serve With Creamy Cucumber Salad

This refreshing side dish pairs wonderfully with:

● Grilled chicken

● Baked or grilled salmon

● Burgers

● BBQ pulled pork

● Sandwiches and wraps

● Fresh fruit

● Pasta salad

● Potato salad

Final Thoughts

Sometimes the simplest recipes become the ones we make over and over again. This Creamy Greek Yogurt Cucumber Salad is cool, creamy, and full of fresh flavor—perfect for warm summer days or anytime you want an easy side dish that everyone will enjoy.

If you make this recipe, I’d love to hear how it turned out! Leave a comment below and let me know if you added your own special twist.

Happy cooking!

– Debra Roinestad | The Comfy Cabin

Easy Creamy Greek Yogurt Cucumber Salad

Sometimes the simplest recipes become the ones we make over and over again. This Creamy Greek Yogurt Cucumber Salad is cool, creamy, and full of fresh flavor—perfect for warm summer days or anytime you want an easy side dish that everyone will enjoy.
Total Time 30 minutes
Servings: 6 people
Course: Side Dish
Cuisine: American

Ingredients
  

  • 2 large cucumbers, thinly sliced
  • ½ small yellow onion, thinly sliced (optional)
  • ½ cup Greek yogurt
  • 2 tablespoons light mayonnaise
  • 1 tablespoon rice vinegar or fresh lemon juice
  • 2 teaspoons Splenda or your favorite sweetener
  • 1 tablespoon fresh dill, chopped (or 1 teaspoon dried dill)
  • ½ teaspoon salt
  • ¼ teaspoon ground black pepper
  • 1-2 teaspoons milk optional, to thin the dressing
  • chopped chives, to sprinkle on top optional

Method
 

  1. Thinly slice the cucumbers and pat dry with paper towels.
  2. In a medium bowl, whisk together the Greek yogurt, mayonnaise, vinegar (or lemon juice), Splenda (or your favorite sweetener), dill, salt, and pepper until smooth.
  3. If you’d like a thinner dressing, whisk in 1–2 teaspoons of milk until it reaches your desired consistency.
  4. Add the cucumbers and onions to the dressing and gently toss until evenly coated.
  5. Cover and refrigerate for at least 30 minutes before serving. The flavors become even better as they chill.

Notes

Optional Add-Ins:
Feel free to make this recipe your own!
●Halved cherry tomatoes
●Thinly sliced radishes
●Fresh chives
●Fresh parsley
●Crumbled feta cheese
● Fresh dill gives the brightest flavor, but dried dill works well too.